Friday, March 29, 2013

coconut tea cake

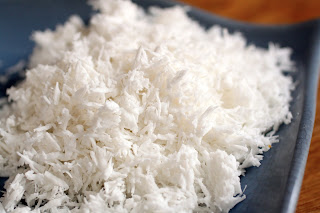
 each week, i bake a cake to take to the new group of students attending the master gardener's classes.  this week, i had to do a bit of foraging in the cupboards-i hadn't gone to the grocery store and my options were few.  for some reason, which i cannot explain, i found 5 cans of coconut milk in the closet.  then, while searching for some shredded coconut, i came across a package of fresh-frozen coconut from birdseye.  it is finely shredded and barely sweetened but most importantly, it tastes pretty close to fresh coconut and it doesn't involve the hassle of opening a coconut and removing the flesh.

since there are at least 50 students in the class, i made a big 10" (12 cup) tube shaped cake.

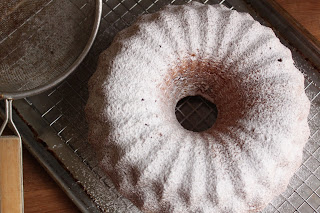
after the cake cooled, i dressed it up with a simple glaze and sprinkled some toasted coconut over the top.

coconut tea cake
1 (12) cup cake serving 16-20

7 ounces unsalted butter, softened
2 1/2 cups sugar
1/2 teaspoon salt
2 teaspoons vanilla
4 eggs
4 cups all purpose flour
4 teaspoons baking powder
3/4 cup finely grated fresh coconut (or the frozen shredded, thawed)
1 can coconut milk, whisked smooth if lumpy
1 1/2 cups powdered sugar
3-4 tablespoons of half and half (or coconut milk if you have some extra)
1/2 teaspoon vanilla
1/4 cup shredded coconut, toasted (or not if you prefer)
preheat the oven to 350.  grease and flour a large tube or bundt cake pan and set aside.  place the butter, sugar, salt and 2 teaspoons of the vanilla into the bowl of a food processor.  pulse to combine.  with the machine running, add the eggs, one at a time and allow to mix in.  scrape the mixture into a large mixing bowl since the rest of the ingredients will be folded in by hand.  place a mesh strainer or a sifter into a bowl.  place the flour and baking powder into the strainer/sifter and set aside.  stir the shredded coconut into the mixture-make sure there aren't any hard lumps of coconut in the batter by breaking them up with your fingers.  sift the dry ingredients over the batter.  fold the mixture a few times and then pour the coconut milk over the batter.  carefully fold together until no streaks remain.  scrape the batter into the prepared pan and bake until a pick comes out clean, about 1 hour and 15 minutes.  allow the cake to cool in the pan for 15 minutes.  remove the cake from the pan and allow it to cool on a rack.

when the cake is completely cool, whisk the powdered sugar with 3 tablespoons of half and half and the vanilla.  add additional half and half as needed until you have a thick glaze.  using a spoon, drizzle the glaze over the top of the cake.  decorate with a little toasted coconut.

enjoy!

Tuesday, March 19, 2013

mocha chip cookies; twd/bwj


when you join a group of bloggers dedicated to preparing every recipe in a specific book, you do not always have a say in what is made next.  we put it to a vote but as votes go, the recipe with the most votes is the one chosen to be prepared next.  some recipes are simple and quick, others are time consuming, stretching across several days from start to finish and the latter describes our previous challenge.  after the hard work of making croissants from scratch, we were rewarded with a simple as well as easy batch of cookies.  to see the full recipe, consider buying or borrowing (from a library) the book, baking with julia.  and for those not so inclined, visit the website of this weeks host, peggy of galettista.

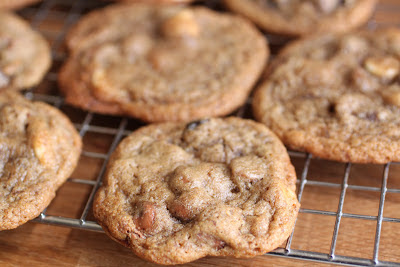
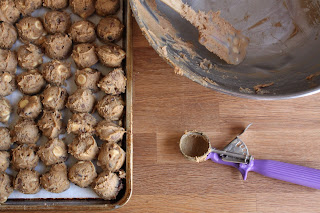
the cookies consist of an unlikely combination of chocolate pieces with coffee and dried apricots.  my first reaction was not encouraging.  i made the choice to use milk and white chocolate chips, instant espresso powder and half of the amount of chopped apricots called for in the recipe.  as always, when i make cookies, i use a scoop to portion them out.  this way, the cookies are almost identical in size which allows them to bake more evenly.  the recipe called for chilling the dough first, then shaping them.  with my experience in large scale baking on a daily basis, i felt they should be scooped first then chilled; that is so much easier on the scoop and my right hand!

since i planned to take these cookies to a meeting, i multiplied the recipe and made a batch and a half.  with my handy purple scoop, i easily made more than 70 cookies which was plenty for everyone to sample as well as leave a few at home for my husband.

the comments some of the other bakers made was that the cookies were thinner than expected.  my guess is that the oven temperature was off.  my oven has the option of using convection.  when using the fan, the general rule of thumb is for the temperature to be reduced by 25 degrees.  with that in mind, i baked the cookies at 350 with the fan on.  now wait a minute, the recipe instructions call for baking at 350-how is this a reduced temperature?  the toll house cookie recipe, and these are almost identical to the toll house recipe, calls for baking the cookies at 375.  with the reduced amount of flour in the recipe, the cookies spread thinner so the only way to stop that is with a higher temperature to force the dough to set and halt the spreading.  another note, that time of 10-12 minutes was totally impossible for a temp of 350.  as a matter of fact, i used a higher temp with convection and it took 12 minutes per pan minimum(and yes, i keep a thermometer in the oven).  think about it, the dough was chilled for hours, it needed longer time in the oven to warm up, spread and set.  if you used the temp of 350(regular oven) and cold dough for 10-12 minutes, your cookies most likely came out thin because of under baking which caused the structure to collapse when they were removed from the oven.  

in the end, i came home from the meeting with an empty plate.  a couple people hunted me down to ask me about them.  having tasted them, i was surprised.  never would i have thought that dried apricots would blend with espresso.  would i make these again?  maybe, but i would add a couple extra tablespoons of flour.  be sure to visit tuesdays with dorie page to see what the other bakers came up with.

Monday, March 18, 2013

this year's baking of the bread, joan's irish soda bread

can you believe it is that time again?  well it is, and i did it again.  every year on or around st. patrick's day, i make a loaf (or two) of my aunt joan's irish soda bread.  this year was no different except that i took it out to the garden to share it with my volunteers.  since i have posted the recipe before, here is the link.  my request, bake a loaf and make a promise-help keep the roads safe, don't drink and drive and please, stop someone who has been drinking from driving.  stay safe my friends.

Saturday, March 16, 2013

dinner for two: barley risotto and roasted brussel sprouts

my quest for a lower cholesterol level continues.  over the last year, i have taken to preparing vegan dinners several times a week.  generally, i make sure that there are leftovers as well so i can also get a lunch or two out of them.  luckily, there are so many good books and websites out there to guide me.  and before you think that vegan cooking is simply utilizing meat substitutes, think again.  sure that is a reasonable line of thinking but truth be told, there are so many options that never include meat (or any animal products) to begin with.  besides, many of those simulated meat and dairy products are highly processed and that makes them a little less appealing to me.

in the past, i have mentioned my tendency to shop in thrift stores.  one of my other favorite haunts is mckay's books.  if you live in nashville (as well as knoxville and chattanooga), then you are familiar with the place.  in short, mckay's is one of the largest used book stores around.  and by large, i mean large. my husband and i will go there and easily spend an hour or more perusing just a few of the shelves.  the prices are very reasonable and the selection ranges from vintage to new with all of the bases are covered.  while scanning the shelves, i have found books on just about any type of cooking or baking.  just don't expect to find everything all of the time.  repeat visits are necessary if you are really looking for a specific book or type of book.  

it took me several visits, but i managed to find two of the vegan books i wanted and one of the best scores ever, a $2 copy of how to cook everything by mark bittman.  while this book is not the least bit vegan, many of the recipes can be easily adapted if necessary.  while rummaging through the cupboards in search of an easy dinner, i came across a jar of barley.  my first thought was of a risotto made of barley and sure enough, bittman delivered in the form of a simple and fool proof recipe.  

just like with arborio rice, the barley is slowly cooked in a saute pan with mushrooms, onions and herbs.  stock is added, bit by bit, to produce a creamy and pleasing texture that is not clumpy or heavy. the recipe can be made with any kind of stock but the best part is that it does not call for cheese so there was no need for me to use a vegan cheese substitute.  the mushrooms, onions and herbs as well as some white wine, provided plenty of flavor.

and since a meal of barley seems a little lacking, i roasted up a bunch of brussel sprouts using a recipe for roasted cauliflower steaks.  it was simple; mix up the spiced oil blend and rather than brushing it onto thick slabs of cauliflower, then simply coat the brussel sprouts with the oil.  they cook quickly and i only had to turn them over once, in short, an easy dish to prepare since the risotto required some attention.


barley risotto and roasted brussel sprouts
serves 2

barley risotto adapted from how to cook everything by mark bittman
3 cups hot vegetable broth, approximately-more may be needed
1 tablespoon olive oil
1/4 cup finely diced onion
1 cup finely diced mushrooms-any kind 
1/2 cup pearled barley, rinsed
1 teaspoon chopped fresh oregano
1 teaspoon chopped fresh thyme
salt and pepper to tast
1/4 cup dry white wine

keep the stock over low heat so that it remains hot.  heat the olive oil in a saute pan or skillet over medium-low heat and saute the onions until translucent and soft, about 5 minutes.  add the mushrooms and saute until they are soft and have given up their juices, about another 5 minutes.  add the barley and stir until glossy, about 1 minute.  add the herbs, salt, pepper and the wine and turn the heat up to medium high and let the wine reduce until it is almost gone.  reduce the heat to medium-low again and begin adding the broth, 1/2 cup at a time. stir frequently until the liquid is almost evaporated but do not let it dry out or it may scorch.  continue adding the broth as needed until the barley is tender, at least another 30 minutes.  serve immediately.

roasted brussel sprouts adapted from the roasted cauliflower recipe on gluten free fix
1 pound fresh brussel sprouts, raw
2 tablespoons olive oil
1/2 teaspoon turmeric
1/2 teaspoon garlic powder
1/2 teaspoon salt
1/2 teaspoon ginger
1/4 teaspoon paprika
freshly cracked black pepper
preheat the oven to 400.  cut the brussel sprouts in half.  mix the remaining ingredients in a bowl.  toss the sprouts in the oil mixture and spread them in a single layer on a baking sheet that is lined with paper.  roast until caramelized on the outside, about 20 minutes.

Thursday, March 14, 2013

cinnamon swirl coffeecake

as always, when i head out to the demonstration garden, i go with a cake in hand to share with my fellow volunteers.  a simple vanilla cake with a ribbon of cinnamon sugar, nuts and chocolate chips is a pretty typical choice.
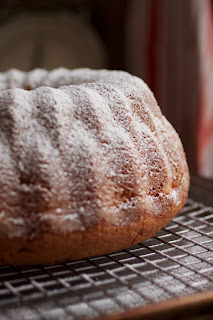
to make it look pretty, first choose an interesting pan.  i have many tube pans in my collection and some are plain while others like the one i used, have patterns.
cinnamon swirl coffeecake
1 (12 cup) cake serving 12 to 16

8 ounces unsalted butter, softened
2 1/2 cups sugar
1/2 teaspoon salt
2 teaspoons vanilla
4 eggs
4 cups all purpose flour
4 teaspoons baking powder
2 cups buttermilk
1/3 cup cinnamon sugar (or 1/3 cup sugar mixed with 2 teaspoons cinnamon)
1/2 cup chocolate chips
1/2 cup pecans or walnuts

preheat the oven to 350.  grease and flour the cake pan and set aside.  place the butter, sugar, salt and vanilla into the bowl of a food processor.  pulse to combine.  add the eggs, one at a time and pulse to combine.  scrape the mixture into a large mixing bowl.  place the flour and the baking powder into a sifter or a mesh strainer and sift it over the batter in the bowl.  fold the batter a few times, add the buttermilk and mix until no streaks remain.  carefully spoon 1/3 of the batter into the prepared pan.  sprinkle half of the cinnamon sugar over the batter and then top it off with half of the chocolate chips and nuts.  carefully top this with half of the remaining batter and carefully spread it into an even layer.  sprinkle the remaining cinnamon sugar, chocolate chips and nuts over the batter and then top it off with the remaining cake batter.  spread the top of the batter so that it is even and touches the sides and middle core of the pan.  bake until a pick inserted comes out clean, about 1 hour to 1 hour and 15 minutes.  allow the cake to cool in the pan for 15 minutes and then invert it onto a rack to cool completely.  when the cake is cool, sift a little powdered sugar over the top.  cut with a serrated knife.  leftovers, if there are any, will freeze nicely.  just wrap slices well and freeze for a month or two.  to defrost, let the slices sit out at room temperature with the plastic still on them.

Wednesday, March 6, 2013

this is how i roll; croissants, anyone?

 so, if it is tuesday, it is time to bake with julia, right?  oh, that's right, it's wednesday and i am a day behind.  such is life, my life, a day late and a dollar short.  whatever.  luckily for me, this week's challenge was one that i was really excited about.  back in the day, i made croissants daily.  but back then, i did it with a dough sheeter, not a rolling pin.  this was going to be a bit of a challenge after all.

if you aren't already familiar with the tuesdays with dorie group, we are a bunch of bakers working our way through the book, baking with julia.  for the recipe to this week's challenge, visit the page of this weeks host, amanda of girl + food = love.  if you would like to see how the rest of the group did, check out the tuesdays with dorie page.

before we get started, let me share a few of my observations, opinions and what nots.  first of all, i only followed the instructions for assembling the dough and making the folds.  and if you ask me, the directions were not always easy to follow.  and judging by some of the other bakers results, i was not the only one who had this issue.  needless to say, i did not always do as instructed by the recipe.

 every month, i attend a potluck dinner with my fellow master gardeners and i decided to make the croissants my contribution.  in order to share them with everyone, i made mini croissants.  i rolled the dough out to the required 15"x24" and cut it into 3 (5") strips.  i marked the strips every 3 inches on one long side.  to get triangles, starting at the other long edge, i marked it 1.5"in from the edge and then again every 3" across.  using a rotary cutter, i cut the dough by going from bottom to top and back down to the bottom-connecting the cuts to make triangles.   i did this with the other strips as well.

 to shape them, i carefully stretched the dough and rolled them up.  as i placed them on the pans, i curved the edges in a little.   here is another way i departed from the instructions, i bagged the trays and put them in the fridge to rise slowly overnight rather than using the oven to proof them (more on that in a moment).

 so easy to do

 perfectly proofed.  now, about the rising time.  i noticed on a couple of the bakers blogs that their croissants melted.  my guess is that the instructions were not clear.  the contributing baker suggested rising them in an oven that was turned off.  that gives the impression that at some point, the oven was turned on and heated then turned off.  what she should have said was an unheated oven or a cold oven with a pilot light or an oven light turned on.  a heated oven would cause all of the butter to melt out and the croissants would collapse in a puddle.

 how do you know if you proofed them long enough, they should be more than double in size but still slightly firm to the touch.  left-proofed, right-not proofed.

 perfectly bronzed, and crispy and flaky

look at the lovely interior.  a little chewy and a little flaky-tasty any way you look at it!  thanks for hosting amanda.  and one more note, these are for you grandma, something tells me that you would have enjoyed them...