Sunday, January 30, 2011

warming up with #9 of 52 pies in 52 weeks

this winter has been colder and snowier than usual.  around here, just about everyone has had their fill of snow and the hassles that come along with it.  today, the temperature broke 50 and it was sunny.  it was a taste of what lies ahead and i can't wait.   the chance to weed the garden and sow seeds.  to watch sleeping plants slowly reappear.  to see the bees flying around in search of blooms.  for the first harvest of fresh greens.  but for now, it is all a lovely vision of what isheaded our way and that means i must content myself in the kitchen.  in honor of the coming season, i have chosen two things that make me think of spring.  easter pie is a popular italian pastry and depending on which version you make, it can either be a ricotta cheese cake studded with candied citrus fruit or a savory pie filled with meats and cheeses.  since spring generally means a new growth of rhubarb in the garden, i chose the cheesecake.  to incorporate the rhubarb, i made a compote to serve over the slice.
lurking in my refrigerator are many different flours and for the crust, i chose semolina-after all, this is inspired by italian cheesecakes and the sandy texture of semolina seemed like a good choice.  the dough is a little sweet due to a generous addition of brown sugar which also helps give the dough some extra color.

many italian style cheesecakes call for candied citron and orange peels.  since they are hard to come by once fruitcake season over, i decided to use the fresh grated zest of an orange and a lemon along with some vanilla bean seeds.
the filling, which was mixed up quickly by hand, was poured into the prebaked tart shell and then topped off with a non-woven lattice top.  the rhubarb compote was served chilled and added to each slice as it was served.  surprisingly enough, everyone has a generous slice with the compote when i serve it-even the kids!  the compote tastes a little like cranberry sauce-the kind made with fresh berries but that could also be because the flavorings added to it can always be found in the cranberries i cook for thanksgiving dinner each year.


lattice topped ricotta cheesecake with rhubarb compote  
makes 1 (9") serving 8-10  

semolina crust
makes enough dough for two 9" tart shells or one tart shell with a lattice top

1 cup all purpose flour
1 cup semolina flour
1/4 cup brown sugar
1/2 teaspoon salt
2/3 cup shortening (i used spectrum brand mechanically pressed organic palm oil-non hydrogenated shortening)
4-5 tablespoons cold water
place the flours in a bowl with the brown sugar and the salt.  using your fingers, rub the mixture together to completely incorporate the brown sugar.  using a pastry blender, two forks or your fingers, cut in the shortening until it is in small peas sized pieces.  add the water, first the 4 tablespoons, and mix until it comes together and forms a soft dough.  add the extra tablespoon of water slowly and only if needed.  form the dough into a thick disk, wrap it in plastic and chill for several hours.  can be made 2-3 days ahead.

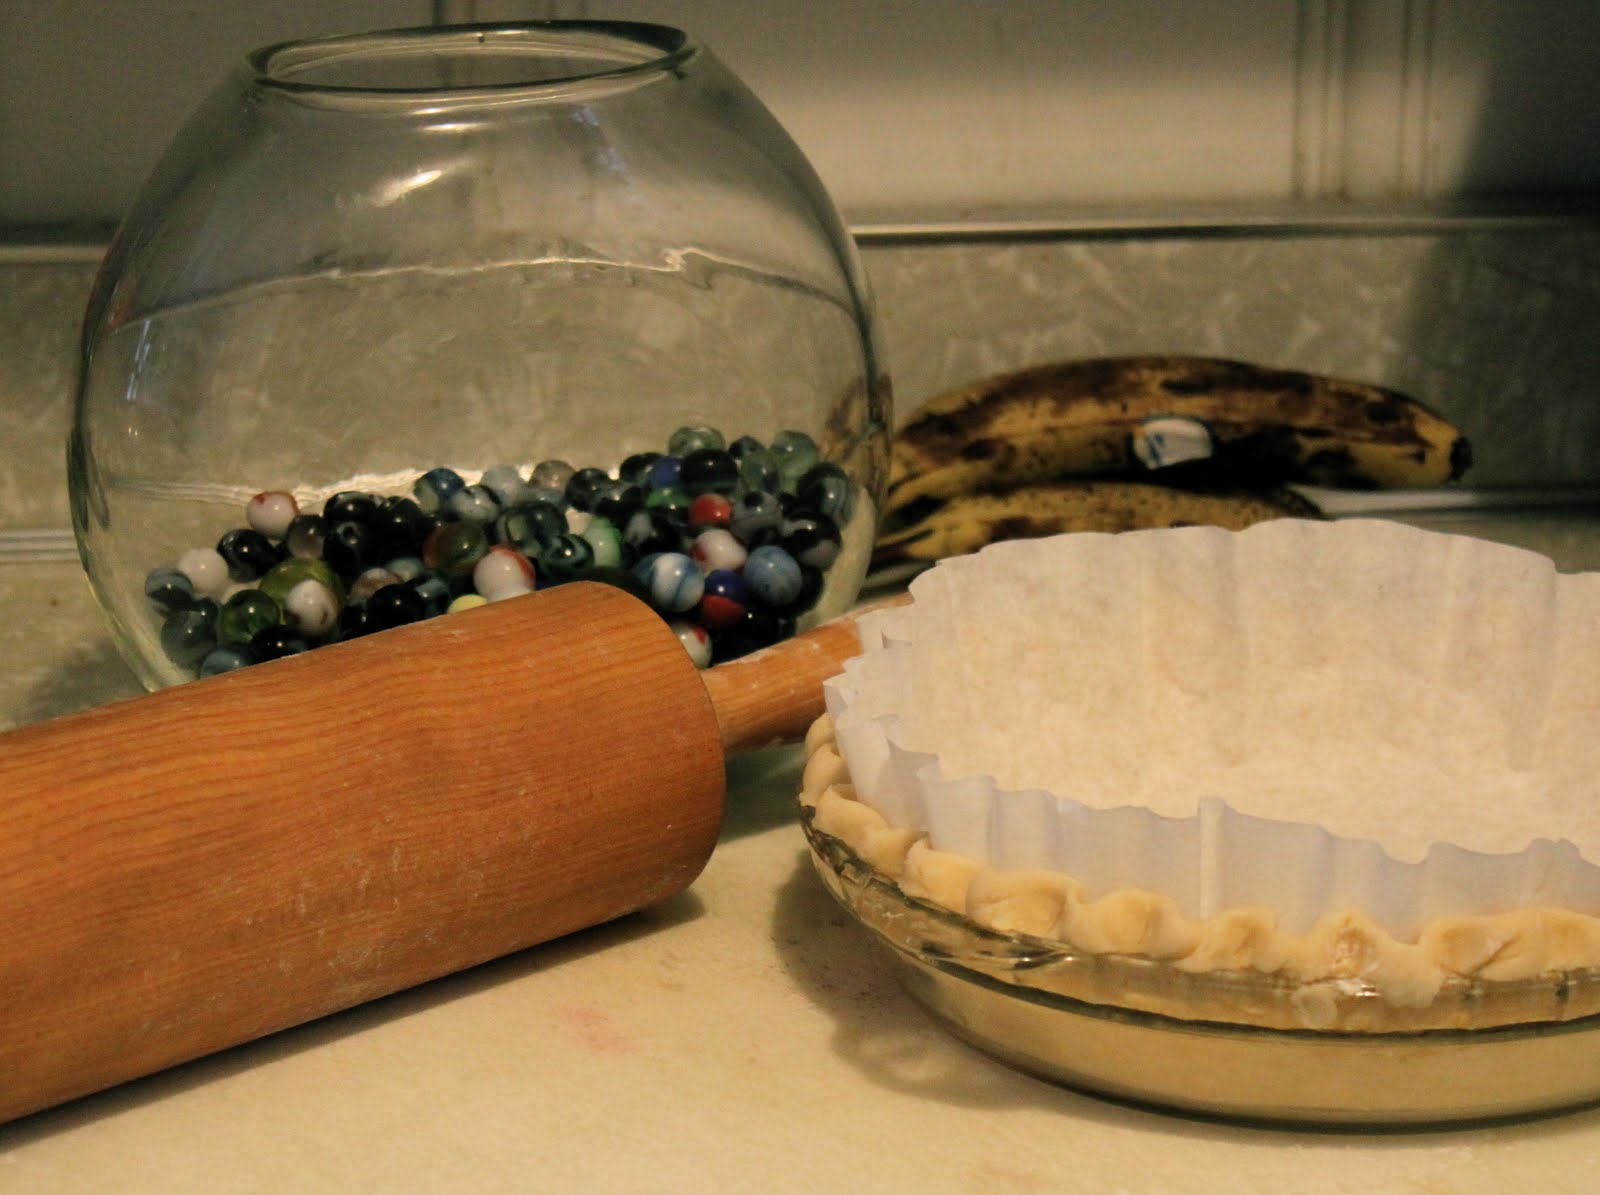
to make the tart shell, allow the dough to soften a bit at room temperature.  it should be soft enough that it yields to gentle pressure.  grease a 9" tart pan with a removable bottom and place it on a sturdy baking sheet.  preheat the oven to 325.  take a piece of dough that is slightly less than half of the disk and form it into a round patty.  on a floured surface, roll out the dough so that it is larger than the pan; it will need about 2 inches of surplus around the entire pan.  carefully place the dough in the pan and referring to the photo above, fold the extra dough in to make the sides a double thickness.  line the tart shell with a piece of parchment or coffee filters and fill it with weights.  prebake the crust until it is no longer shiny and translucent on the bottom but it should not have gained much color, about 20 minutes.  for more hints on prebaking pie shells, refer to this previous post.  while the crust bakes, mix the filling.  pour the filling into the prebaked pie shell and top it with lattice strips if desired.  bake the tart on the sheet pan at 325 for about 325 until it is firm and the top crust has baked, about 50 minutes.  chill the tart before serving.  cut into edges and serve with a dollop of the rhubarb compote.

ricotta cheesecake filling
3/4 cup sugar
2 tablespoons all purpose flour
1 teaspoon finely grated zest from 1 orange and 1 lemon-2 teaspoons total
seeds from half of a vanilla bean, reserve the pod for the compote
1 (15oz) container of part skim ricotta (i chose this because it was the only one without additives)
2 eggs
2 egg yolks
2/3 cup heavy cream
in a bowl, rub the sugar with the flour, zests and vanilla beans until it is all combined and the vanilla beans are dispersed evenly.  using a spatula or wooden spoon, mix in the ricotta and blend it well.  whisk in the eggs and the yolks, scrape the bowl well and carefully whisk in the cream.  it is a custard filling and is best not to add too much volume so only whisk to combine.  

rhubarb compote
makes about 2 cups 
2 cups rhubarb, sliced 1/2" thick (i used frozen rhubarb which is sold with the frozen fruit in the supermarket where i shop)  if using frozen, allow it to thaw and include the juices that collect.
1/2 cup sugar
1/2 cup water
1 teaspoon freshly grated orange zest
combine all of the ingredients in a small sauce pan and slowly simmer until the rhubarb begins to break up and it turns a light rosy shade.  remove the vanilla pod and the star anise pod and chill completely before serving.


Saturday, January 22, 2011

mini fried cherry pies, #8 of 52 pies

it seems that winter has decided to stay here for a while.  we have had another round of snow and it gave me a chance to play in my own kitchen for a change.  when i was working on my book last year, i developed this recipe.  since there were more recipes than needed, it was cut from the list of recipes to be included and it has been lurking in the background ever since.  normally, i wouldn't make something like this-i do try to behave on occasion.  but something about cold, snowy days made me think of fried cherry pies.  and as a result, i just had to pull out that recipe and make them.   enough time had passed that i was completely unfamiliar with the recipe and any of it's quirks.  the beauty of it all is that there aren't any quirks and no corrections needed to be made to the recipe meaning that i done good the first time!   tart red cherries can be hard to find.  if you are the sort who doesn't mind buying large quantities, they can be found online in quantities of 5-10 pounds but they are frozen and the extra expense of the shipping made them undesirable to me; i decided to use the canned cherries i found at the supermarket.  honestly, you could use any fruit you like here-just adjust the flavorings and the sugar as needed and if you are short on time, you could use a premade fruit pie filling.


i made my dough the day before and then took it out to soften.  when it was ready to be rolled, i grabbed my high dollar cutter (an empty family size soup can) and the biggin (my favorite big rolling pin) and i rolled out all of the dough circles.  i also made the filling in advance so i was able to then start filling and sealing the pies.  in the mean time, the oil was heating on the stove in my cast iron skillet.


***a note of caution to all who dare to make these pies, never walk away and leave a pan of oil heating on its own!  it is very easy to overheat and a fire could easily be started!!!  if you do not have a fire extinguisher, consider adding one to your kitchen***

use a thermometer and a cast iron skillet for the best heat management-the thermometer will let you know if the oil is too hot or too cold and the skillet holds the heat making regulating the heat easier.  have your pies ready and near by and also have a place to put the cooked pies close by too.  i used a cooling rack on a sheet pan.  a pair of tongs will be very helpful-the ones like they use in restaurants are a good choice and easy to find.


after you have fried all of the pies, make the glaze and drizzle it over the pies with a spoon.   then stand back and watch them disappear!


mini fried cherry pies
makes about 18 small pies


fried pie dough
1 ½ cups all purpose flour
¾ teaspoon salt
6 tablespoons unsalted butter, cold and cut into cubes
1/3 cup buttermilk (you may need a little extra)
1 egg yolk

place the flour and salt in a mixing bowl and whisk them to combine.  using a dough cutter,  two knives or your hands, cut the butter into the flour mix until you have small pieces and the flour resembles coarse meal.  combine the buttermilk and the egg yolk and pour it over the butter/flour mix.  stir it together to form a firm dough adding additional buttermilk if it is too dry and crumbly.  shape it into a patty, wrap it in plastic and allow it to rest in the fridge for at least an hour and up to 3 days or you can freeze it for as long as a month.

tart red cherry filling 
2 (14.5oz) cans tart cherries in water
½ cup sugar
½ teaspoon almond extract
¼ teaspoon cinnamon
¼ teaspoon red food color-optional
3 tablespoons all purpose flour

place the cherries and the juice into a sauté pan with the sugar, extract, cinnamon and the food color if you are using it.  bring it to a gentle boil over medium-low heat and simmer until the liquid is reduced by 2/3.  sprinkle the flour over the mixture, stir it in and return it to the boil for at least 1 minute to cook the flour.  place the filling in a heat proof dish, cover and chill completely before using it.


assembling and frying the pies
flour for rolling the dough
1 egg mixed with 1 tablespoon water
enough oil to fill a  10” cast iron skillet 1-1 ½”  deep, (i used 3 cups canola oil)
1 cup powder sugar
2-3 tablespoons water

cut the dough into 2 equal pieces.  roll out the dough a bit thinner than you would for a pie, somewhere between an eighth and a sixteenth of an inch.  using a 4” cutter, cut as many circles as possible by positioning the cuts close together.  do not worry if some of the circles overlap slightly or if you have imperfections, it is not crucial to have perfect circles.  repeat this with the other half of the dough.  there should be about 12 circles at this point.  gather the scraps, pat them together and roll the dough out again.  you should get about 6 more circles.    place the oil in the skillet, attach a thermometer to the side of the  pan and heat to 350 over medium low heat.  while the oil heats, place a few circles of dough onto your work area, brush off the excess flour and place a scant tablespoon(almost a full #50 scoop) of filling in the center of each circle.  brush half of each circles edge with the egg wash.  fold over the dough and seal it shut with your fingertips first and then with the tines of a fork to be certain the seal is firm.  when the oil is at temperature, carefully lower 3 to 4 pies into the oil with out splashing.  allow the pies to fry on each side for 2-3 minutes or until a nice golden brown color is achieved.  turn them carefully so that you do not splash oil.  lift the pies out of the oil and place them on a rack to drain.  fry the remaining pies in the same manner.  to make the glaze, sift the powdered sugar into a bowl and whisk in the water to make a smooth icing.  drizzle the icing over the pies with a spoon.


any of you adventurous sorts out there that want to try this at home, please do and then send me a picture(bakinbabe116@aol.com) and i will post it here, a round up if you will for anyone who dares...

Friday, January 21, 2011

round up #2, chocolate mousse pie with banana caramel sauce

when benni rienzo first tweeted that she would be making this pie, i was excited.  not many of you reading this blog have been adventurous enough to make the pies and send me photos.  needless to say, i have been waiting to see how the pie turned out.  and it looks to me that despite the challenges that having twin boys and a husband out of town can impose on a baker, benni done good!


thanks so much for baking with me benni!!!  hope you can do it again some time, soon.  and to all of you reading this blog, bake along with me, i promise to post the photos if you send them to me!!!

Sunday, January 16, 2011

spinach, artichoke and mushroom quiche-#7 of 52


it's cold and dreary and that's typical of winter. what's not typical is all of the snow we have had lately-just one look at the view from our front door and you can see what i am talking about. before you start snickering and laughing that this isn't enough snow to whine about, think about this-that little bit of snow and the slush and ice it created was enough to keep schools in nashville closed for an entire week. now let's get back to the cold and dreary theme i was working on...meals made of comfort food were the only thing that lightened the mood. way back when, we had a bakery cafe and quiche was often on the menu. darry would make them two at a time and we would generally run out every time. looking back at those days brings a bit of melancholy-oh the stress, the never ending taxes, the drama of employees...how i miss it all (NOT!!!) and yet i do sometimes. the quiet mornings baking breads and breakfast pastries, decorating cookies and wedding cakes. fresh soups and salads and panini sandwiches. and friends-other business owners/employees located in the building as well as some of our own employees. it has been 6+ years and we have all moved on but the quiches still make an appearance on our dining room table. each year on thanksgiving, we host the dinner at our house and our tradition for the morning after is to serve a quiche breakfast for our guests before they start the trip back home. with this in mind, last monday while the snow blanketed the neighborhood, i baked a quiche to brighten the day.

anyone who knows darry, knows his love of mushrooms. we have them growing in the yard on inoculated logs and there are several houses around us with yards where they grow wild. darry picks them whenever he finds them (with permission of course) and we eat mushrooms in all kinds of dishes. for this quiche, i combined baby portabella bella mushrooms with spinach and artichoke hearts. to save some time, use frozen spinach crumbles and while it is still slightly frozen, chop it a little to make it a bit finer in size. if you can find frozen artichoke hearts, use those rather than the ones packed in a jar or can. for one, they will not be marinated or brined and will taste more like a fresh artichoke. the other plus is that your quiche will not be dominated by the flavor of a brine or marinade.
spinach, artichoke and mushroom quiche
yields 1 (10") quiche serving 8-10

to make the best and easiest quiche to serve, use a quiche dish. they tend to be shallower than a pie dish and a little larger. i found my 10" corning ware quiche dish in the thrift store for $2.99!

pie dough-use your favorite recipe or purchase some and make a pie shell. this filling recipe will work in a deep (9") pie shell as well but make sure it is one of the really deep ones such as a pyrex deep glass dish found in most supermarkets and stores. once the pie dough is lining the dish, you will need to prebake it. place parchment, foil or coffee filters into the pie shell, fill it with dried beans or weights and prebake it at 325 until it is no longer shiny on the bottom but is not yet coloring at the edges probably about 18-20 minutes. for more hints on this, see my previous post.

2-3 tablespoons olive oil
3/4 cup diced onion, about 1/2 of a large onion
1 clove garlic, minced
8 ounces baby portobella mushrooms, sliced
1-2 tablespoons dry white wine
2 cups frozen spinach crumbles
2 cups frozen artichoke hearts
1 1/4 teaspoon kosher salt
1/4 -1/2 teaspoon freshly ground black pepper
pinch of freshly grated nutmeg
2 cups good quality grated swiss cheese-gruyere, jarlsberg or other favorite
1/2 cup freshly grated hard cheese such as parmesan, asiago or romano
8 eggs
2 cups heavy cream

in a large saute pan, heat the olive oil and saute the onions. when they are beginning to look translucent, about 3 minutes, add the garlic. saute the garlic while stirring frequently for a minute. add the mushrooms and the herbs de provence. after the mushrooms are heated through and are beginning to sizzle a little, add the wine and cover the pan to force them to release their juices. after a minute or two, remove the cover and stir to prevent sticking. add the spinach and the artichokes as well as the salt, pepper and nutmeg and stir to combine. reduce the heat a bit, cover the pan and cook to thaw the spinach and artichokes. after a few minutes, remove the lid and continue sauteing the vegetables to prevent sticking and to dry out the water that is being released by the frozen ingredients-a crucial step to a good quiche since watery vegetables will make a loose quiche that will not set properly. when the water has been dried out enough, the vegetables will begin to stick to the bottom of the pan. remove the pan from the heat and allow the mixture to cool in the pan. at this point, you will be able to see if you have cooked it enough; as it sits, liquid will pool at the bottom if it was not dried out sufficiently and you can return it to the stove if necessary. preheat the oven to 350. once cooled, spread the mixture evenly over the bottom of the crust. sprinkle the cheeses evenly over the vegetables. in a small bowl, whisk the eggs to combine them and then whisk in the eggs. only mix to incorporate, try not to add lots of air or you will have bubbles in the custard and the results will be a less creamy quiche. place the quiche dish on a sturdy baking tray and slowly pour the custard over the filling. allow the quiche to sit for a minute or two so the custard can become distributed evenly throughout the filling leaving. bake until the quiche is firm around the edges and the center is not jiggly, about an hour for a shallow 10" quiche dish. allow the quiche to sit for 10-15 minutes before cutting and serving.

any of you adventurous sorts out there that want to try this at home, please do and then send me a picture(bakinbabe116@aol.com) and i will post it here, a round up if you will for anyone who dares...

Saturday, January 8, 2011

lime margarita pie, #6 of 52


nothing brightens your mood like a sunny day in the middle of winter. a tart citrus pie is just what you need to bring a little of that sunshine to your palate and chase the doldrums away. a little tequila wouldn't hurt either... i found myself with a bag of limes that had been forgotten in the fridge. a quick trip to the corner liquor store and i had a small bottle of silver tequila to go with the triple sec lurking in the cupboard. after pondering the plan for a day, i decided to make this a no bake pie; the filling is a mousse.

first i made a lime curd base with a little added lemon juice. it seems that limes are more bitter than sour and i wanted this to be a little on the tart side. i did a little research and discovered an article on art of drink all about margaritas and what the taste balance of one should be, it was very informative and it can be found here. as i let the base cool, i got to work on the crust.

for a margarita to be balanced in flavor, it must have some salt. what better to bring salt to a pie than a bag of pretzels? we live on pretzels here and there is always at least one bag in the closet. for this recipe, i chose the classic thin twists simply because they had the most salt on them. after grinding them, mixing them with sugar and melted butter, i pressed the mixture into a glass pie plate and moved on to the mousse.

for mousse to be mousse, it requires adding whipped ingredients-whipped cream and egg whites. since i was using my hand mixer, i whipped the whites first and then the cream so i would not have to wash the beaters. yes folks, i can say it, i'm a lazy baker...the whites were whipped with sugar to them to keep them from becoming sudsy and dry which will also make folding them in a little easier. be sure you do not whip them as stiff as they will go-let them droop a little like in the photo. the cream needs to be whipped until stiff but not so stiff that it is almost butter-you want that to be a little soft too or it could break during the folding process. since there is gelatin involved, pour the mousse into the pie shell and let it set in the fridge for a few hours or it will be too loose to cut into pretty slices. garnish with additional whipped cream and pretzels if you wish.

lime margarita mousse pie with pretzel crust-serves 8-10

zest of one lime
4 ounces fresh squeezed lime juice-about 6-8 persian limes (regular green ones)
2 ounces fresh squeezed lemon juice-about 2 lemons
1/2 cup sugar
6 egg yolks (use large eggs and save the whites)
2 tablespoons cornstarch
2 ounces tequila, preferably silver (clear, colorless)
1 ounce triple sec or curacao
1 package gelatin
3 cups pretzel twists
3 tablespoons sugar
5 tablespoons unsalted butter, melted
4 egg whites
3 tablespoons sugar
1 cup heavy cream

zest the lime, set this aside. juice the limes and lemons. measure the juice and place it in a non reactive sauce pot with the 1/2 cup sugar; set it over medium heat. stir occasionally to dissolve the sugar. pour the tequila and triple sec into a microwavable cup and sprinkle the gelatin over the top to soften it. in a heat proof bowl, whisk the egg yolks with the cornstarch until no lumps remain. when the juice comes to a slow boil, pour it into the egg yolks while whisking them. pour this mixture back into the sauce pot and over medium low heat, return to a slow boil while whisking continuously. allow to boil gently for 1 minute and immediately pour through a strainer into a heat proof bowl (use a clean one, never mix raw and cooked eggs!). stir in the zest. heat the gelatin in the microwave on low or defrost for about 20 seconds to liquefy it. pour the gelatin into the lime curd and whisk until smooth. press plastic wrap over the surface and leave it at room temperature to cool. it should be cool to the touch with no trace of heat-this also prevents the gelatin from setting hard at this point.

to make the pretzel crumb crust, grind the pretzels in a food processor until fine, this should yield 1 cup of crumbs; be sure to measure the crumbs-1 full cup is needed. mix the crumbs with the sugar and butter and toss to combine. press the mixture to the sides and bottom of a 9" pie plate. set aside until the mousse is complete.

in a mixing bowl on high, whip the egg whites until foamy. add the sugar and whip until almost completely stiff but they still droop slightly when the beater is raised. set the whites aside and in a separate bowl, whip the cream until almost stiff as well. when the base is completely cooled, pour it into a large but shallow mixing bowl. fold in the whites and then fold in the whipped cream and only fold until combined with no streaks visible. scrape the mixture into the prepared pie shell and cover with plastic. refrigerate for several hours to set the gelatin.

to serve, use a knife dipped in hot water to slice and be sure to clean it after each cut. pie can be garnished with additional whipped cream and pretzels if desired. to anyone that cares to bake along, send me photos and i will post them. email me at bakinbabe116@aol.com and your photos will be added to the next entry.


Sunday, January 2, 2011

ringing in the new year with a chocolate mousse pie, #5 of 52

this last week has been a bit of a blur. time flew and before i knew it, it was new year's day. we have had a bunch of rain-something not in short supply here and the weather has made it a bit gloomy. darry decided to make a nice dinner for the girls and me to celebrate the new year. for dessert, i made a chocolate mousse pie in a coconut crust with a drunken banana caramel sauce. just what we needed to warm up the cold and gloomy day.

chocolate mousse pie in a coconut crust with a drunken banana caramel sauce-serves 10

as always, i pulled out the biggin-my favorite rolling pin and i found my marbles. the dough was made in the food processor, pressed into a thick disk and chilled for a few hours. when it was time to roll it out, i let it come to room temp and lined a glass pie dish-this one is a big pyrex dish and it is deeper than most. the crust is allowed to rest in the fridge for an hour to minimize shrinkage when baked. the crust must be completely baked since the pie filling is a mousse and will not be baked.

coconut crust-1 (9-10 inch) pie crust
1 cup all purpose flour
1/4 cup powdered sugar
1 teaspoon baking powder
1/4 teaspoon salt
6 tablespoons unsalted butter, cold and cut into small cubes
3-4 tablespoons coconut milk (unsweetened)
place the flour, powdered sugar, baking powder and salt into the bowl of a food processor. pulse a few times to combine. sprinkle the butter cubes over the mixture and pulse until it resembles coarse meal. add 3 tablespoons of coconut milk and pulse until the mixture comes together and forms a soft dough-only add the extra tablespoon of coconut milk if it seems dry and does not come together. form the dough into a disk and chill it for a few hours or overnight. can also be made in advance and frozen for up to a month. allow the dough to come to room temp before rolling out

preheat the oven to 350. roll out the crust, carefully transfer to a pie plate and flute the edges if desired. line the crust with coffee filters or parchment paper and fill with weights. bake until lightly browned around the edges and the bottom (on the inside of the shell) is no longer shiny. remove the weights and prick the bottom a few times, return to the oven and allow the bottom to bake a little longer.

chocolate mousse pie filling
to make the mousse filling, plan on at least 2 hours. the base for the filling must cool before the whipped cream can be added. it is possible to make the filling base and while it cools, tackle the task of rolling and baking the crust.


2 tablespoons dark rum
1 package unflavored gelatin
4 egg yolks
2 tablespoons cornstarch
2 cups half and half
1 cup+ 2 tablespoons sugar
3 ounces unsweetened chocolate
2 cups heavy cream
have a heat proof bowl with a mesh strainer over it handy-you will need it for the custard. place the rum in a microwavable dish and sprinkle the gelatin over it, set aside. place the egg yolks and cornstarch in a heat proof bowl and add a small amount of half and half. whisk until all of the cornstarch is dissolved. pour the remaining half and half and 1 cup of the sugar into a sauce pot. place over medium heat and stir to dissolve the sugar. bring to a gentle boil and temper the yolks by pouring a small amount of the hot half and half into the yolks while you whisk them-you must whisk them or you will scramble them. continue whisking the mixture as you pour half of the hot mixture into the yolks. place the remaining hot half and half back onto the stove at medium heat and begin whisking the milk. while you whisk the half and half, pour the tempered yolks into the pot. continue whisking the custard in the pot until it comes to a boil. allow it to boil gently for a minute to cook the starch. place the gelatin mixture in the microwave and on the lowest setting, heat the mixture to bring it to a liquid state in 10-15 second intervals. add the chocolate to the hot custard and whisk until it is melted. add the liquid gelatin and stir to combine. pour the custard base through the strainer into the heat proof dish. press plastic wrap to the surface(to prevent a skin from forming) and place in the fridge. do not allow the mixture to get completely chilled or the gelatin will set, you just want it to get cooled enough to add the whipped cream without melting it. it will take a while and you may have to stir it to keep it from setting around the edges.

when the custard base has cooled, beat 1 cup of heavy cream until almost stiff and gently fold it into the base. place the base into the cooled pie crust and smooth out the top. beat the remaining cup of heavy cream with the 2 tablespoons of sugar until stiff and spread over the chocolate mousse in the pie dish. chill the pie while you make the drunken banana caramel sauce.

drunken banana caramel sauce, makes about 1-1/4 cups

use a ripe banana for the most flavor-one that is nice and spotted and very fragrant. caramel is one of those recipes that requires attention-do not walk away or allow yourself to become distracted while the sugar cooks or you could end up with lots of smoke and a burned pot to clean!


1/4 cup banana puree-use a blender, food processor or a food mill to get a smooth puree
1/4 cup half and half
1 tablespoon unsalted butter
1" piece of a vanilla bean pod (use a piece that has been scraped out if you have it)
1 cinnamon stick
1 cup sugar
1/4 cup water
2 tablespoons corn syrup
2 tablespoons dark rum
place the banana puree, half and half, butter, vanilla bean and cinnamon stick in a small sauce pan over very low heat to melt the butter and infuse the flavors. in a separate pot with high sides, place the sugar, water and corn syrup. over medium heat, stir to dissolve the sugar. when it is dissolved, use a brush dipped in water to wash the sugar crystals from the sides of the pot-a crucial step to prevent the mixture from crystallizing. allow the sugar to boil until it begins to caramelize. when it starts to color, gently swirl the pan to keep it evenly colored. allow it to become a nice amber color. remove from the heat and carefully pour in the banana mixture. it will foam violently so use caution when doing this and combine the two mixtures slowly. return the pot to the stove over low heat and whisk to melt any caramel that may have settled to the bottom-2-3 minutes. remove from the heat and add the rum, whisk to combine and pour the mixture into a heat proof bowl. remove the vanilla bean pod and the cinnamon stick and allow the mixture to cool. serving it hot will melt the whipped cream.

to serve, place slices of the pie on plates and drizzle with the caramel. to anyone that cares to bake along, send me photos and i will post them. email me at bakinbabe116@aol.com and your photos will be added to the next entry.